Marie Antoinette (2020) - Robe Polonaise
I used this pattern from Reconstructing History, which I'm afraid I can't recommend. Or at least, I can't recommend the print-at-home version. After printing on 30-some sheets of paper, I had to assemble the whole thing like a weird jig-saw puzzle--which was fine, that's how that's supposed to work--but it came out ENORMOUS. Like, I'm pretty plus-sized, but I don't have a 4 1/2 foot long torso! That problably had something to do with print settings--I've never tried to do this kind of tiled printing before--but next time, I'll pay a bit more and wait for the pre-printed version to ship.
Furthermore, I wasn't trying to get the gown to fit me, but rather my sawed-off mannequin friend. She's a lot less plus-sized than I am, so I had to cut the gigantic pattern WAY down, practically re-creating the whole thing. The upside was that it didn't matter if it fit exactly right. I always have trouble setting sleeves to allow enough freedom of movement, but obviously that wouldn't be a problem here. It also meant I could skip certain steps, such as lining the bodice and sleeves, since I was trying to avoid adding more weight. (Fabric is heavier than many people think!)
The real reason I can't recommend the pattern, though, is that the instructions are so sparse. There are few diagrams, even for the most complicated steps, and the written directions are hard to make sense of without them. For example, "Align the bottom of the armscye of the Sleeve with the bottom of the armhole on the Gown." But the bottom of the armscye isn't marked on the sleeve pattern--the general area is labeled, but not the specific point you need to attach to the underarm seam.
|
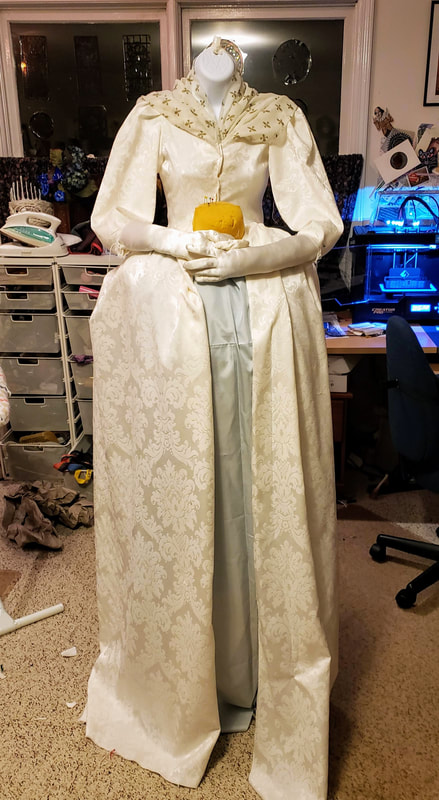
First Fitting
Turns out a polonaise is a perfect gown for this kind of costume, because of the open fronted skirt. I could close it up under my neck and wear a long dress underneath as the "petticoat." Here I've just pinned up a length of fabric to see the effect. Later I found that my old SCA chemise worked perfectly, with a crinoline underneath to pouf it out a bit. I'm partly proud, and partly bemused, that I was able to make this entire outfit from materials I already owned. The only thing I bought special was the mannequin (and a wig, snagged back when costume stuff went on sale after Halloween). The fabric was a giant roll I'd gotten several years ago at a yard sale for 10 bucks, and kept propped up in my closet ever since. It's a gorgeous white-on-white brocade, and even after snarfing up about 7 yards for this costume I think I've still got enought to outfit most of a wedding party. The lace (see below) came off a giant roll found in a thrift store some years back, likewise kept in storage, and likewise only half used up. The fichu (neck scarf) is cut from a curtain that was in turn recycled from a veil from my SCA days. |
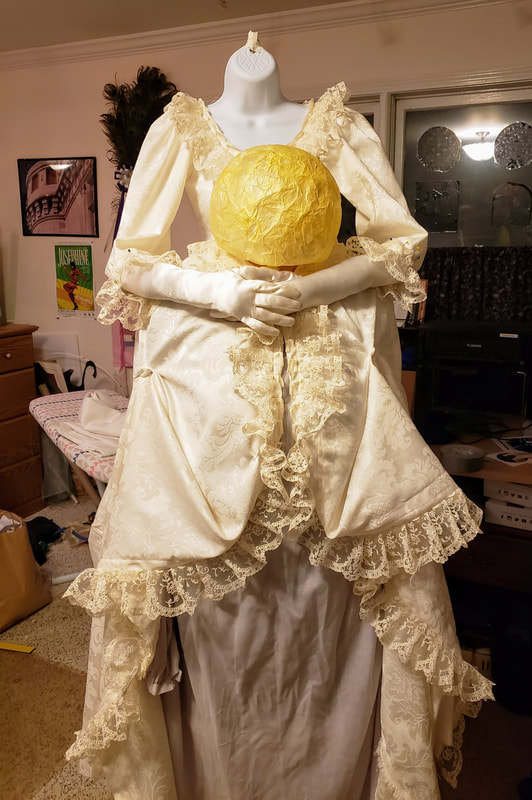
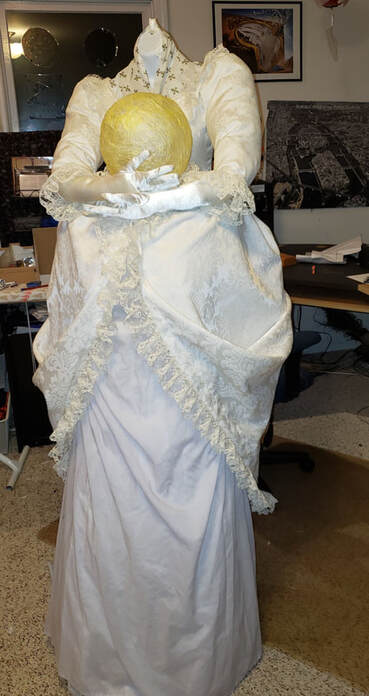
Trimming and Draping
And voila! A little stuffing in the arms, and a balloon to show where my head will go. I'm still experimenting with the set of the arms and the draping of the skirts. All it needs now is a bit of paper mache around the neck, a lot of fake blood, and...me! (Yes, I've tried it on, and it balances nicely, but I couldn't manage a selfie just yet.)
|
|
